Categories - Manage Income Categories

About Income Categories
- All transactions in QuickBAS must belong to a Category
- Income transactions go into Income Categories
- The Category sheet shows Income Categories on the left
- You can create whatever Categories you like, as best fits your business
- We recommend a maximum of about 20 Categories to keep things manageable
- Examples of Income Categories might be Sales, Rent Received, Interest Received
- We recommend a Category called “Other” for miscellaneous income

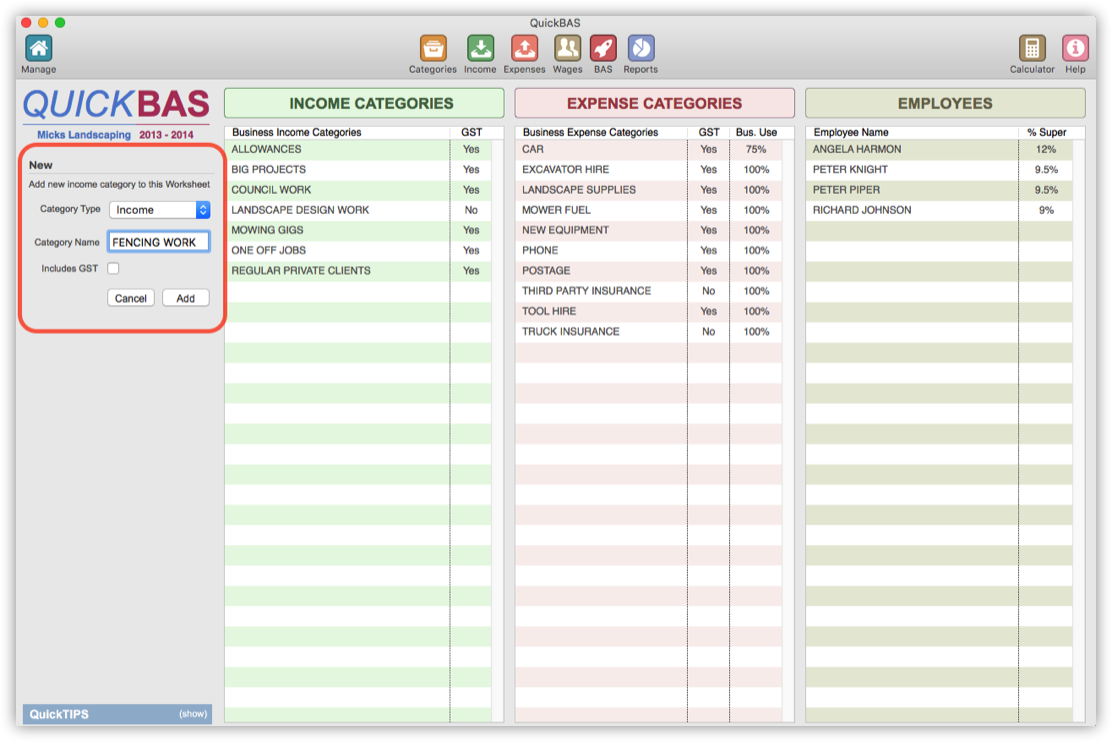
Add an Income Category
- You must already have created and opened a BAS Worksheet
- Access the Categories page by clicking on the Categories icon
- Click on “Income” in the Category Type drop-down menu
- Fill out the Income Category details in the panel
- Click the “Includes GST” box if this Category usually contains GST
- You can edit GST amounts when you enter individual income transactions
- Click “Add” and your new Income Category appears in the list
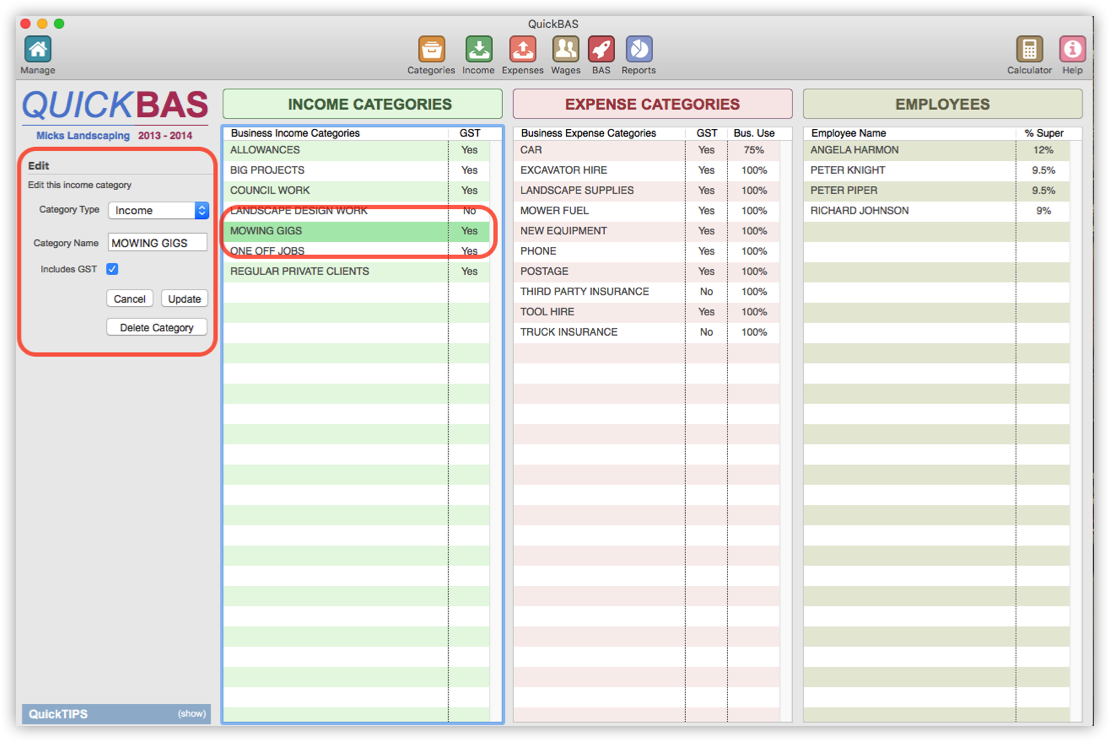
Edit or Delete an Income Category
- Click on the Income Category to edit from the list of Income Categories
- You can change the Income Category name or the default GST status
- Click “Update” to finish the edit
- If you changed the name, then all transactions using that category will also change
- If you changed the GST status, this only affects future entries, not those already entered
- You can delete an Income Category by choosing it and clicking “Delete Category”
- You cannot delete an Income Category that already has transactions
QuickBAS User Guide - Income Categories