QuickBAS makes BAS and Tax Time Easy for small business
Welcome to the QuickBAS Quick Start Guide.
QuickBAS has been designed to make bookkeeping easy for small businesses and sole traders.
This page will get you up and running quickly.
For more details about each step, go to our User Guide main page and click on each topic.
QuickBAS has been designed to make bookkeeping easy for small businesses and sole traders.
This page will get you up and running quickly.
For more details about each step, go to our User Guide main page and click on each topic.


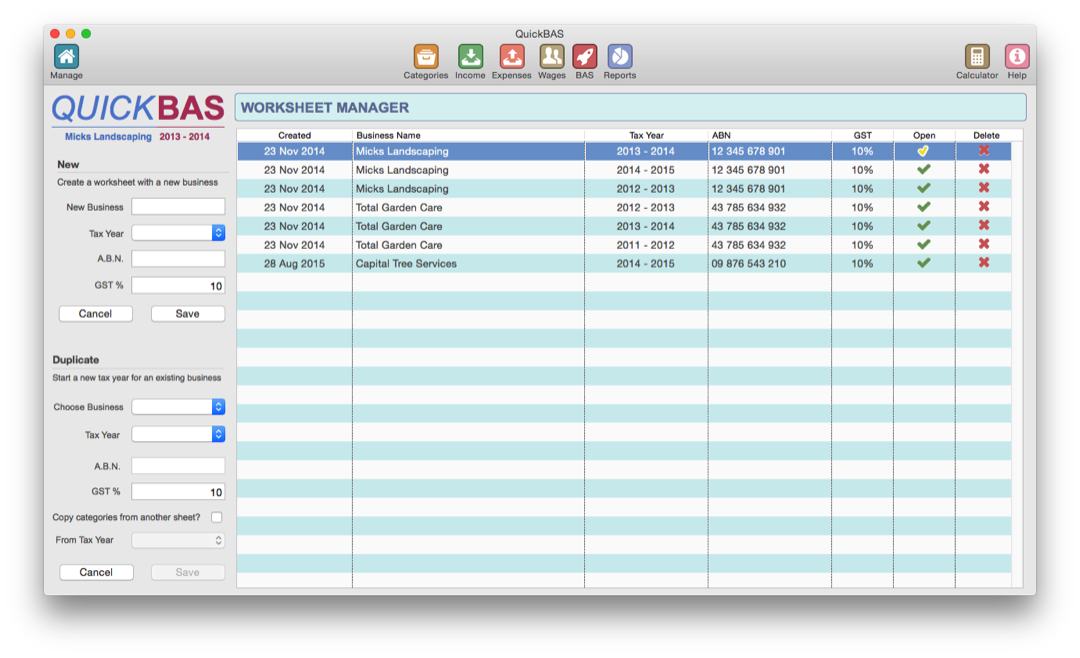
Step 1 - Create a BAS Worksheet
- Click on the BAS Manager icon in the top menu.
- In the menu at left, enter your business name, the tax year, your ABN and the GST rate.
- Click Save. Your new BAS Worksheet is open and ready to use.
- Click on the BAS Manager icon in the top menu.
- In the menu at left, enter your business name, the tax year, your ABN and the GST rate.
- Click Save. Your new BAS Worksheet is open and ready to use.

Step 2 - Add Income, Expense and Employee Categories
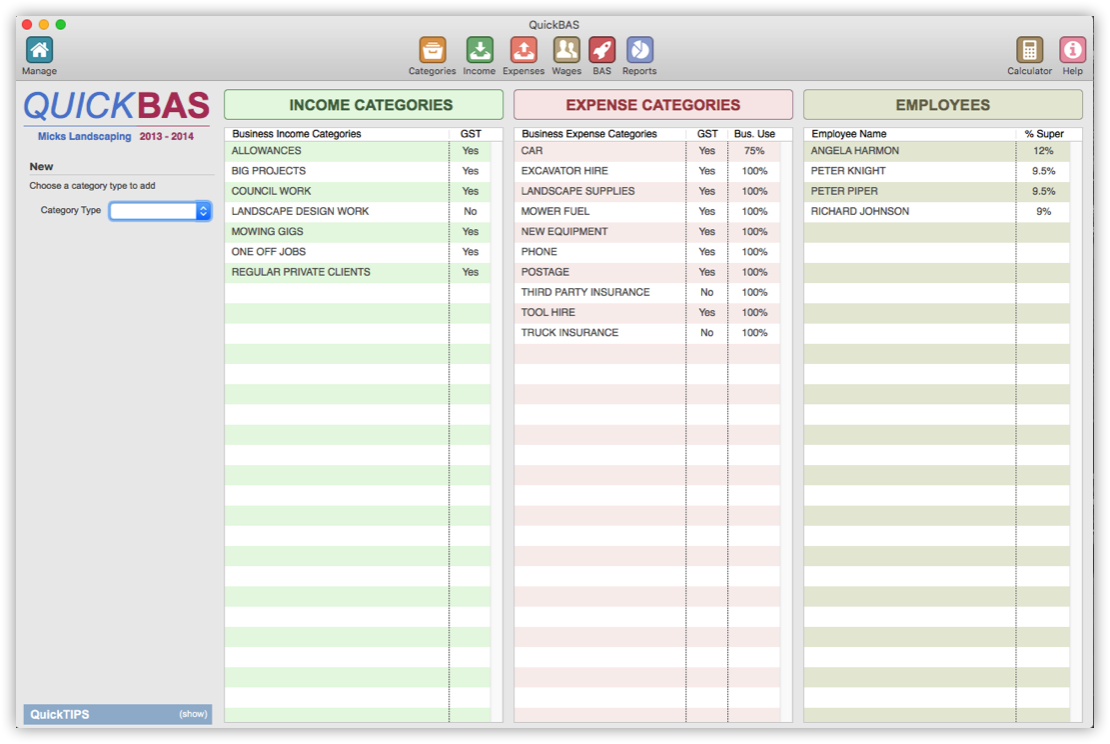
- Every transaction must belong to a category.
- Click on the Categories icon in the top menu.
- Your Income Categories appear in the list at left
- Your Expense Categories appear in the list in the middle
- Your Employee Categories appear in the list at right
- Every transaction must belong to a category.
- Click on the Categories icon in the top menu.
- Your Income Categories appear in the list at left
- Your Expense Categories appear in the list in the middle
- Your Employee Categories appear in the list at right

Step 3 - Add Some Income Transactions
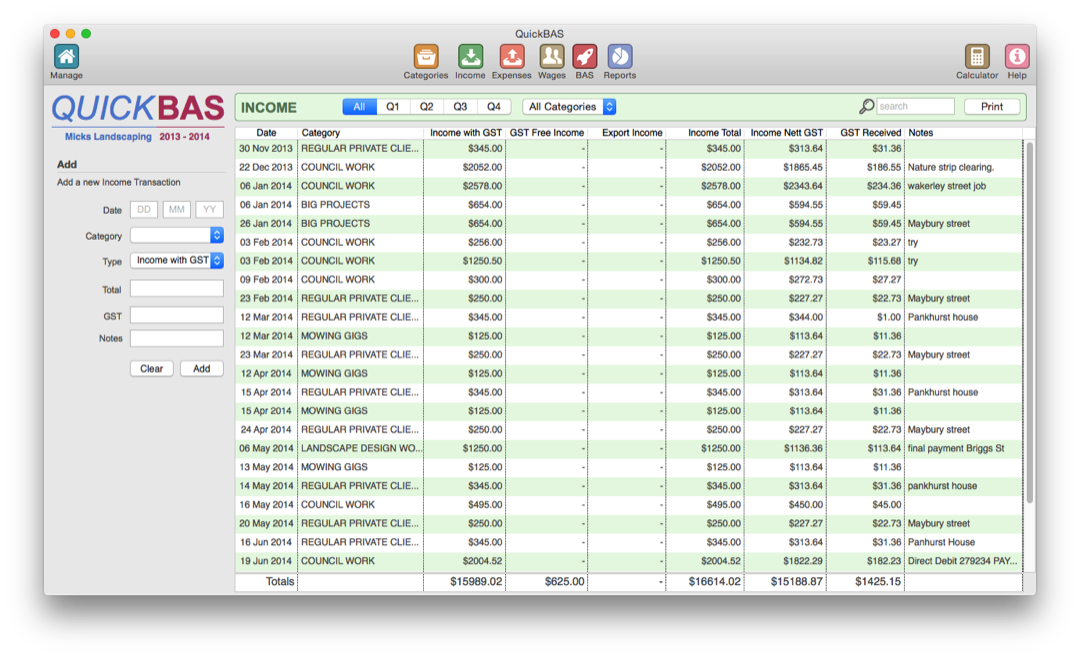
- Click on the Income icon in the top menu.
- Fill out transaction details in fields at left
- Click Save and your transaction appears in the list
- You can also import data from spreadsheets and bank statements
- Click on the Income icon in the top menu.
- Fill out transaction details in fields at left
- Click Save and your transaction appears in the list
- You can also import data from spreadsheets and bank statements

Step 4 - Add Some Expense Transactions
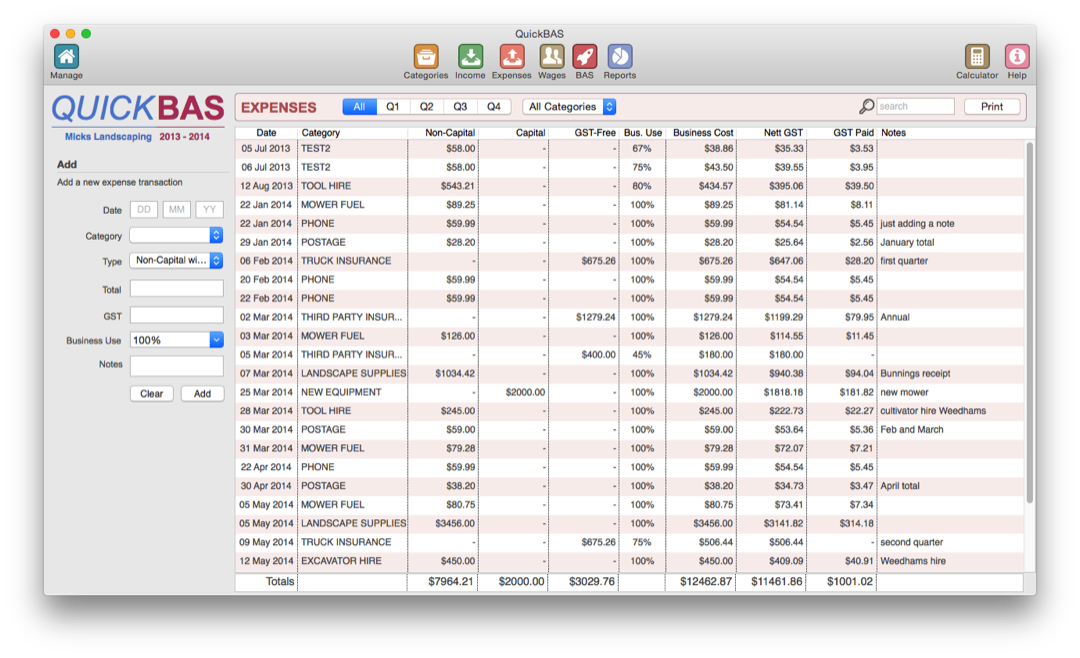
- Click on the Expenses icon in the top menu.
- Fill out transaction details in fields at left
- Click Save and your transaction appears in the list
- You can also import data from spreadsheets and bank statements
- Click on the Expenses icon in the top menu.
- Fill out transaction details in fields at left
- Click Save and your transaction appears in the list
- You can also import data from spreadsheets and bank statements

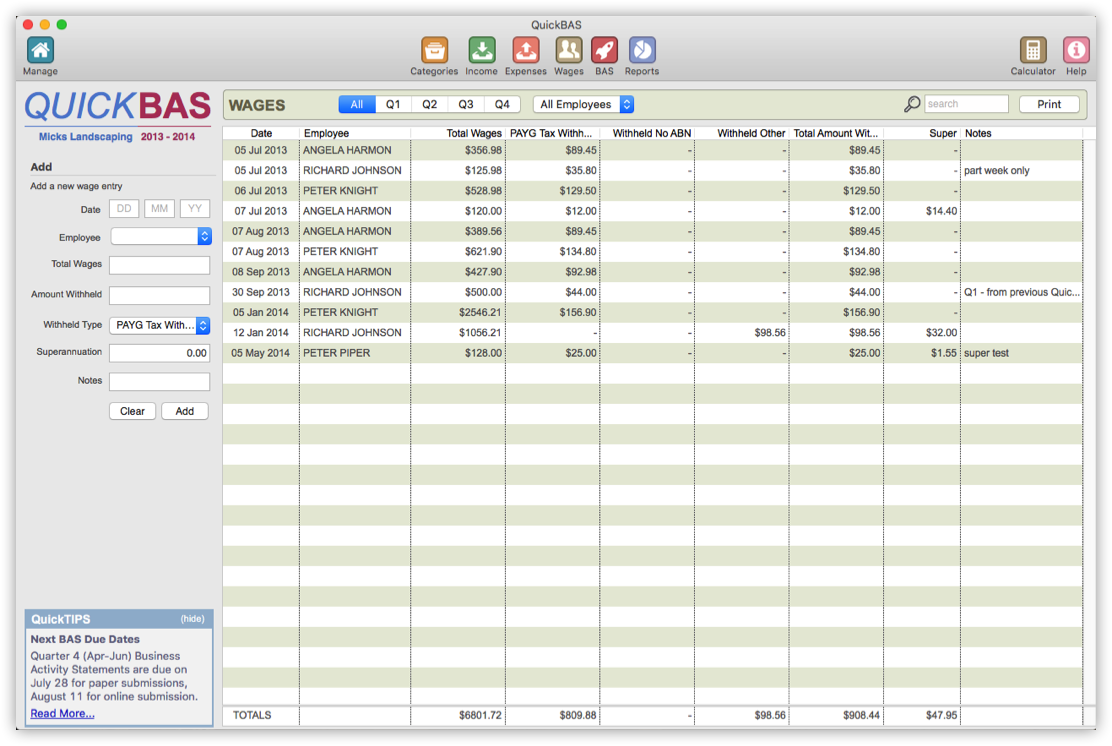
Step 5 - Add Wages and Withholding amounts (optional)
- This is only for businesses with employees/contractors/suppliers.
- Click on the Wages icon in the top menu.
- Add employees using the panel at bottom left
- Then add wages and any tax withheld from those wages.
- This is only for businesses with employees/contractors/suppliers.
- Click on the Wages icon in the top menu.
- Add employees using the panel at bottom left
- Then add wages and any tax withheld from those wages.

Step 6 - Generate a BAS
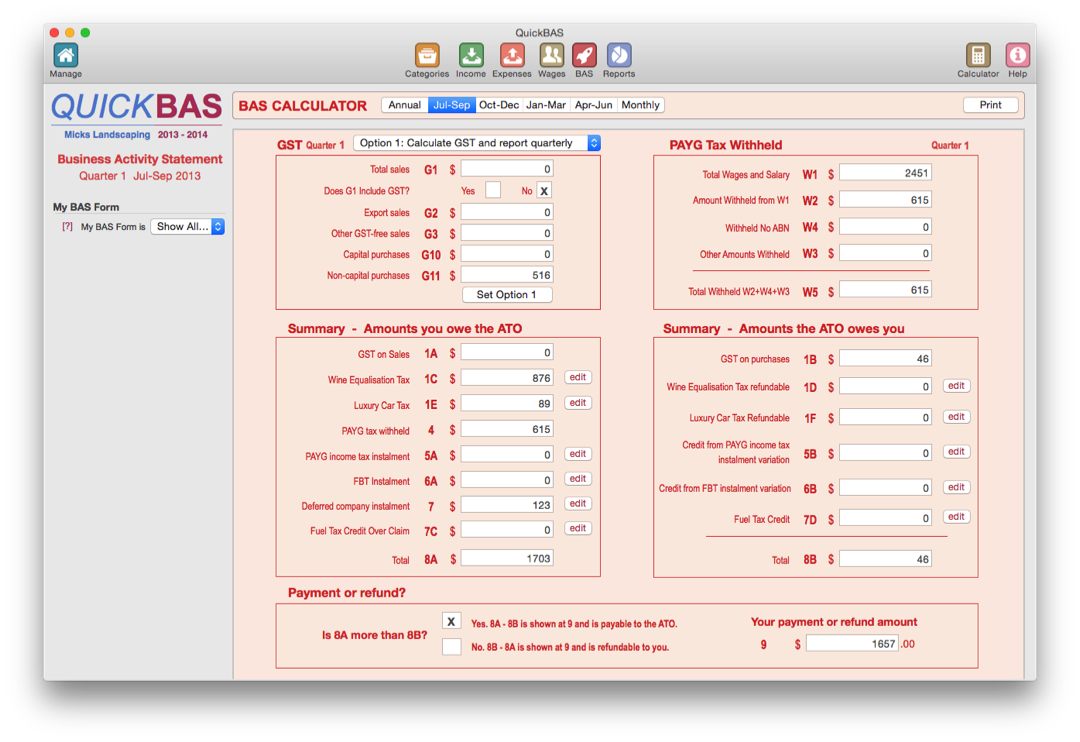
- Click on the BAS icon in the top menu.
- Choose a time period (annual, quarterly, monthly)
- You can edit the extra values such as PAYG Tax
- Your BAS is generated, ready for you to fill out your form.
- Click on the BAS icon in the top menu.
- Choose a time period (annual, quarterly, monthly)
- You can edit the extra values such as PAYG Tax
- Your BAS is generated, ready for you to fill out your form.

Step 7 - Generate a Report
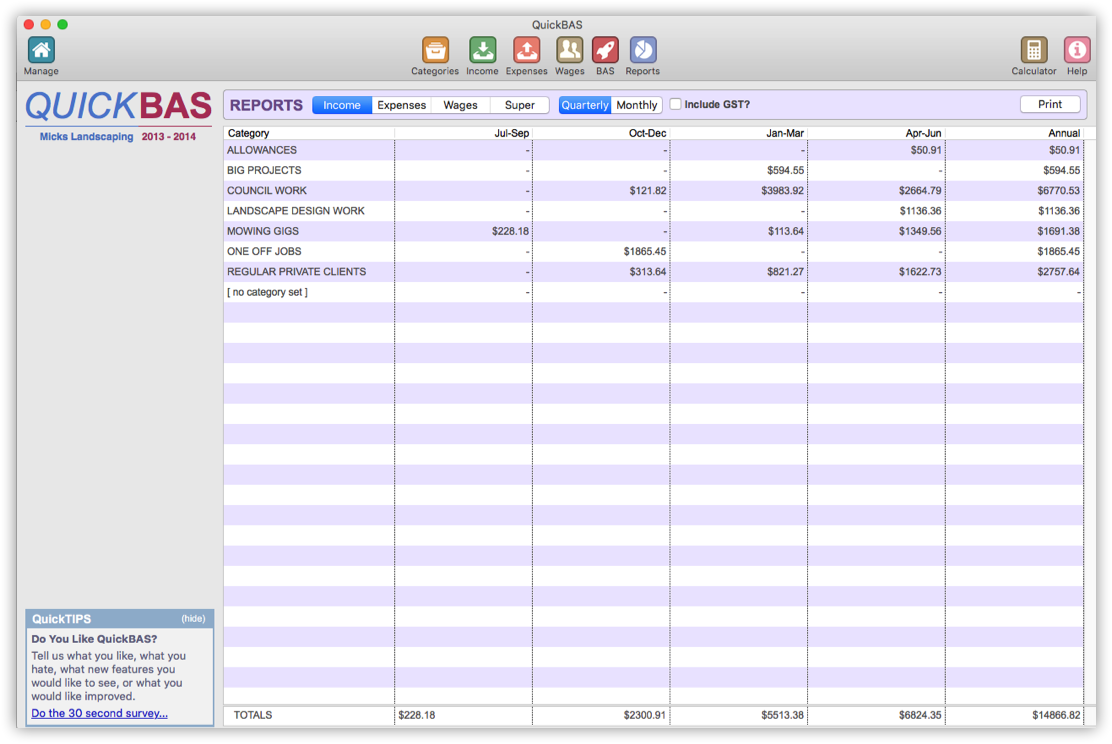
- Click on the Reports icon in the top menu.
- Reports show summaries of your income and expenses by category
- There is also a Wages Report that shows wages and tax withheld by employee
- This can be useful to track expenses and for your annual tax return.
- Click on the Reports icon in the top menu.
- Reports show summaries of your income and expenses by category
- There is also a Wages Report that shows wages and tax withheld by employee
- This can be useful to track expenses and for your annual tax return.
QuickBAS Features - Business Activity Statement Software
