The Expenses Sheet - Importing Data

Importing Data into QuickBAS
- QuickBAS lets you import bank data or other accounting data without manually typing each entry.
- QuickBAS accepts Comma Separated Values (csv) and Tab Separated Values (tsv) file.
- First export your data from your bank website as CSV or TSV files
- Save that CSV/TSV file to your computer
- Note that this is very powerful feature, and should be used with caution!


How to access the import function
- You can import into the Income and Expense sheets only.
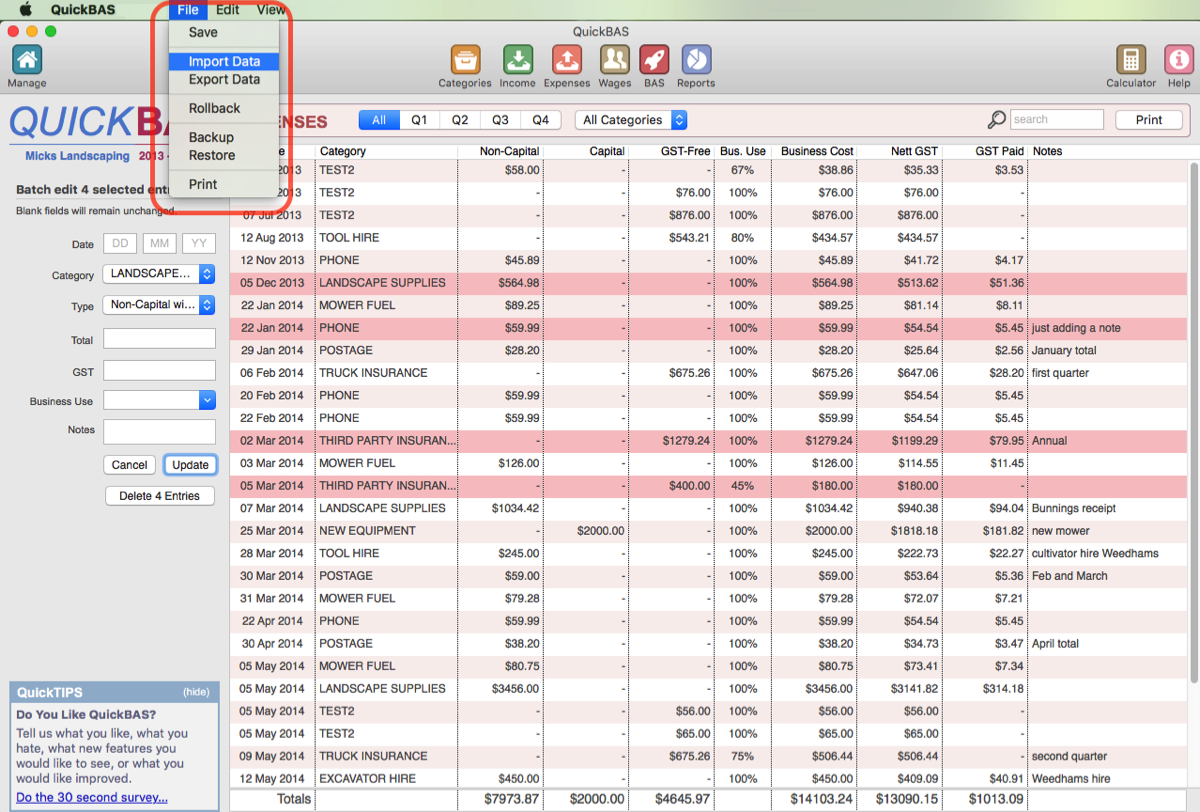
- In the top menu, choose File --> Import Data
- An 'Import Wizard' page appears that will guide you through the import data process.
Data Requirements.
- You must choose a valid csv or tsv file
- These files can have a .csv or .tsv or just a .txt file extension
- QuickBAS does not import OFX, QIF or Quicken files.

How to specify columns
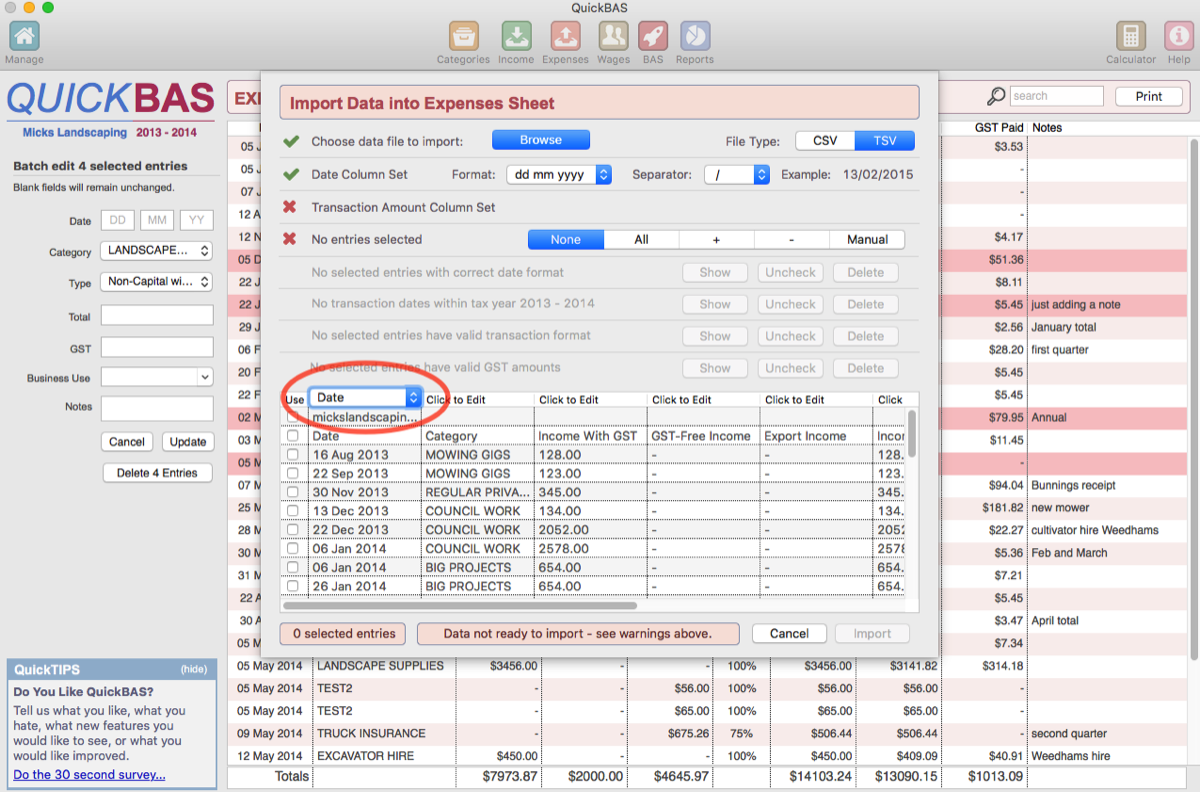
- Click on the column heading to specify data type
- You must specify which column contains the date and transaction amount
- You can optionally include a column containing GST and extra Notes
- Click on the column heading to specify data type
- You must specify which column contains the date and transaction amount
- You can optionally include a column containing GST and extra Notes

Which rows of data will be included in my import?
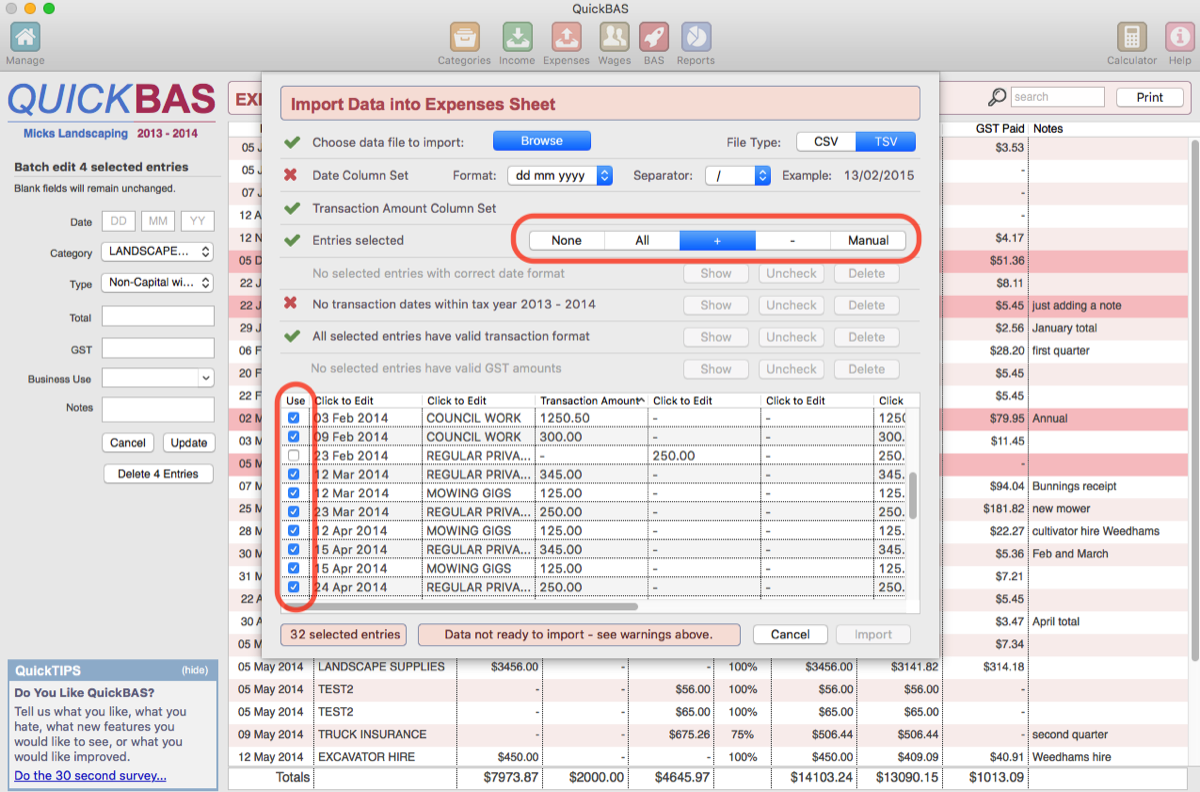
- Only those rows with a ticked box in column 1 will be included.
- You can use the selector to choose rows (none, all, positive values, negative values)
- Or you can manually tick entries to fine-tune your selection
- Only those rows with a ticked box in column 1 will be included.
- You can use the selector to choose rows (none, all, positive values, negative values)
- Or you can manually tick entries to fine-tune your selection

Making sure all data is valid
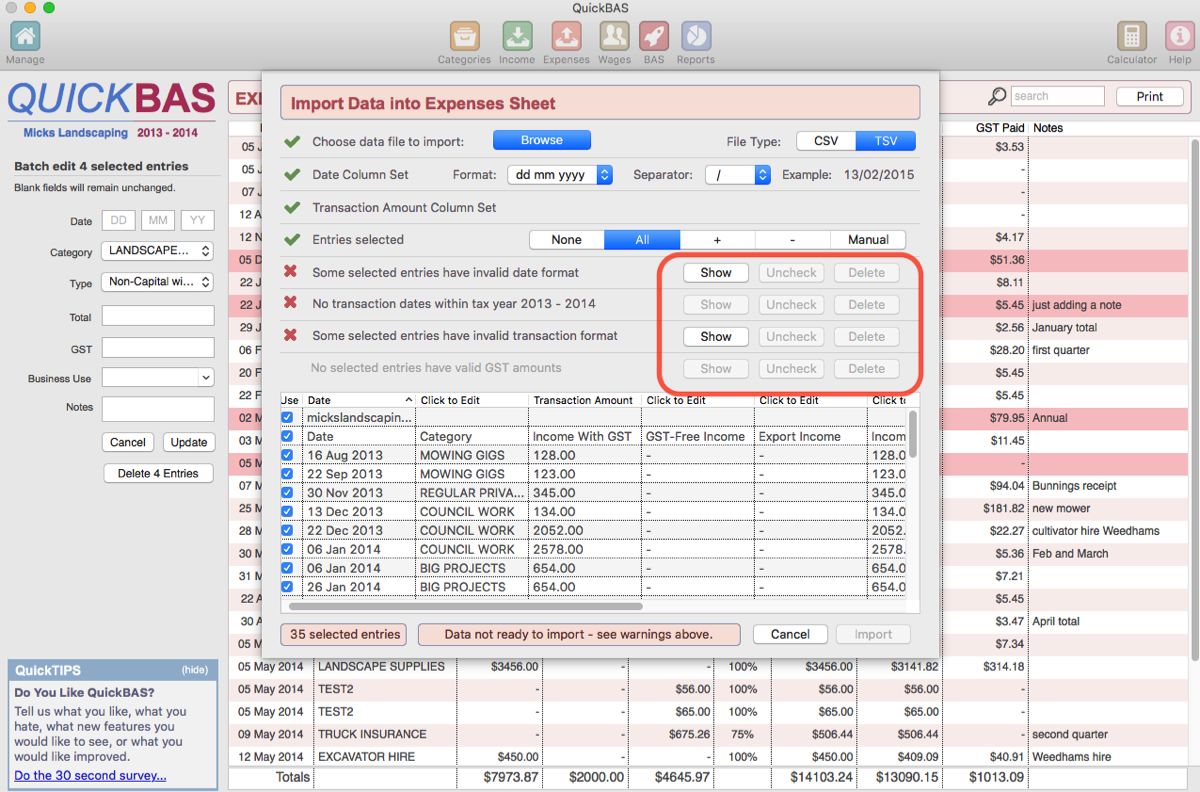
- Every row of data that is ticked must have valid data
- The Import Wizard will warn you if rows of data have invalid values
- You can use the buttons to automatically Show, Uncheck or Delete invalid rows
- Date formatting must match the date format, including the separator
- Dates must be in the tax year you are working on
- Transaction Amounts must be numerical values
- Setting a GST column is optional. QuickBAS will calculate GST values if you don’t
- If you set a GST column, all values must be numeric
- GST amounts must be less that the total Transaction amount
- Only when all rows have valid data will the Import button show

Am I finished when I have imported?
- The newly imported entries will not be set with Categories or Income/Expense types.
- All newly imported data is put into a placeholder category called '[ no category set ]'.
- QuickBAS will show you a filtered view of all the newly imported data.
- You need to click each entry and edit the Category, and the Income or Expense Type
- You can also batch edit a group of transactions, and choose a new Category for them
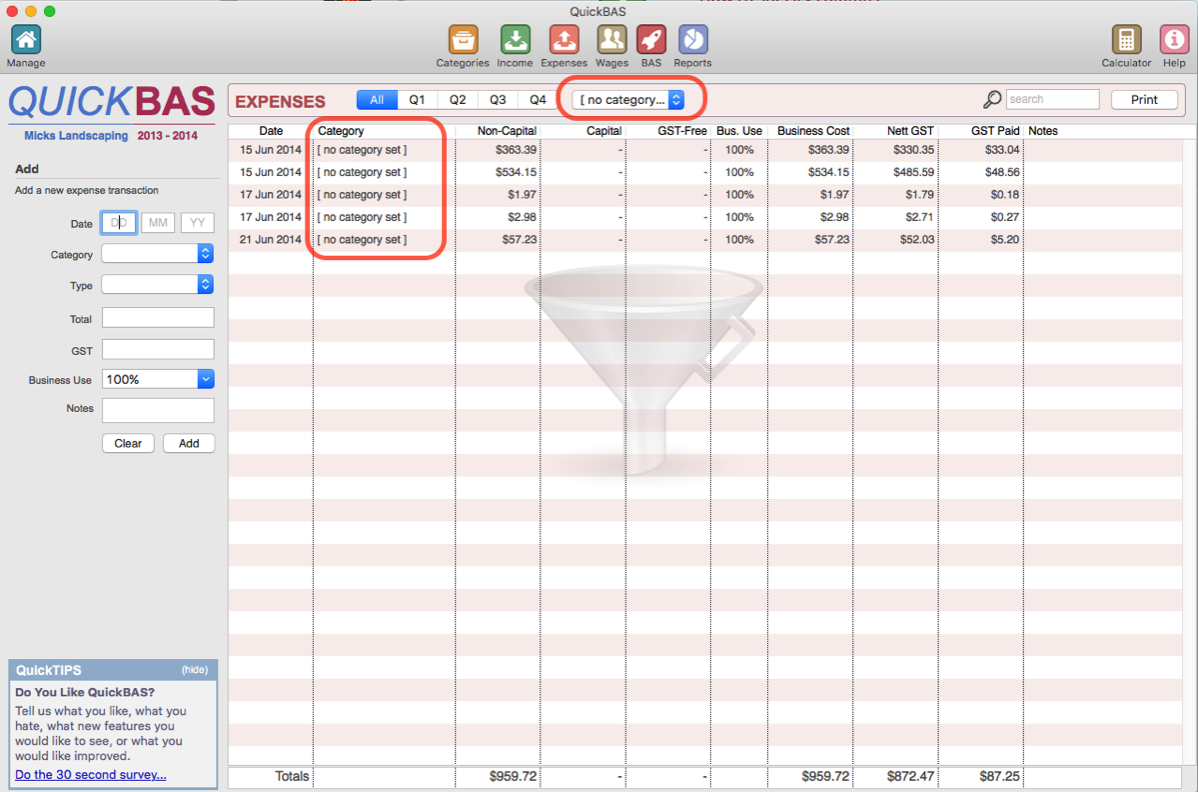
QuickBAS User Guide - Import Expense Data
